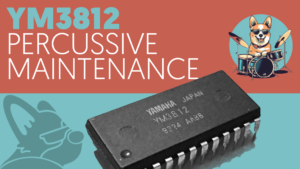
What if you could take all of your beloved retro video games and play them on real OPL 2 hardware… but without using a Sound Blaster or Adlib card? In this article, we are going to do just that by adding percussion support to our YM3812 module. With drums in place, we’ll have enough of the General MIDI spec implemented to route video game music directly into the module!
General MIDI Percussion
In addition to 128 instrument names, the General MIDI standard also defines names for 47 percussion sounds as well. These names bring just enough consistency to the way things sound while still leaving lots of room for interpretation by the different sound artists and manufacturers.
In the last article, we talked about how to assign patches to MIDI channels so that each MIDI channel plays a different “instrument” patch. In doing this, we updated the noteOn function of the YM3812 library to be a patchNoteOn function. This way, when a note comes in from MIDI, we just find the patch associated with the MIDI channel and pass it along with the MIDI note number to play and the class does the rest.

Unlike melodic instruments though, General MIDI 1.0 associates ALL percussion sounds with the same channel—MIDI channel 10. It then uses the MIDI note number to determine which sound to play. This way, each key on the keyboard plays in a different percussive sound, starting on MIDI note 35—B0, up through note 82—A4.
Assigning Sounds to Channels
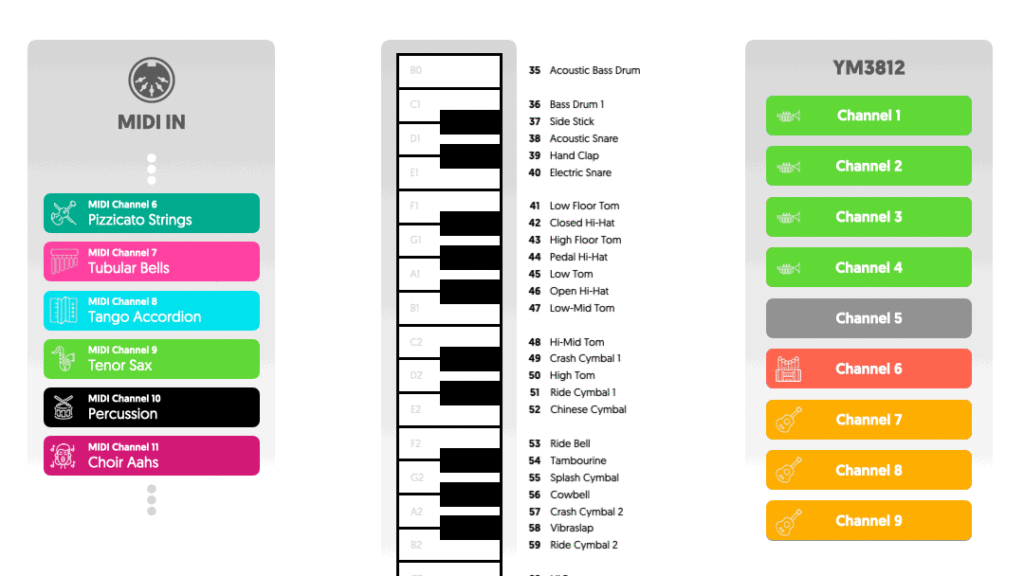
Just like instruments, each key press causes a new patch to be uploaded into the YM3812, but now we use the midi note number to select them. For example, pressing C1 causes the Bass Drum 1 patch to be uploaded, but D1 loads the Acoustic Snare and G#1 loads the Pedal Hi-hat.
In our new ino program file, we can define a few of these key parameters:
#define  DRUM_CHANNEL      10
#define  FIRST_DRUM_NOTE   35

PatchArr drum_patch_data[ NUM_DRUMS ];
uint8_t drum_patch_index[ NUM_DRUMS ];- DRUM_CHANNEL defines the MIDI channel to associate with the special percussion instrument
- FIRST_DRUM_NOTE defines the first MIDI note to associate with a drum sound
- drum_patch_data contains an array of all of the percussion patch settings that have been loaded from PROGMEM into RAM. This is similar to the inst_patch_data array that contains patch settings for each of the instruments associated with the other MIDI channels. Of course the drum array contains many more patches (47 vs. 16) and thus takes up a good chunk of memory (3.6k).
- drum_patch_index contains an array of integers that associate each drum patch with a patch in the patches array. Initially, we fill this array sequentially with the numbers 0 through 46. But later, keeping this reference will make it easier to associate different keys on the keyboard with different patches.
Loading patches from PROGMEM
Just like with instruments, we also need a way to load patch settings into RAM from the patches array stored in PROGMEM. For instruments, we use the loadPatchFromProgMem, but for drums, we will create a new function called loadDrumPatchFromProgMem:
void loadDrumPatchFromProgMem( byte trackIndex, byte patchIndex ){
  for( byte i=0; i<PATCH_SIZE; i++ ){
    drum_patch_data[trackIndex][i] = pgm_read_byte_near( patches[patchIndex+NUM_MELODIC] + i );
  }
}
This function takes two arguments:
- trackIndex determines the slot in drum_patch_data in which to load the patch
- patchIndex determines the drum patch to load from the patches array
There is really only one difference between this function and the loadPatchFromProgMem. Because we stored melodic patches in the first 128 slots of the patches array, we have to add on 128 to get to the first percussion patch. The “128” gets stored as a constant called NUM_MELODIC in the instruments.h file. This file also includes a NUM_DRUMS constant defined as “47” which represents the total number of drum patches.
So, to load the correct patch, we add NUM_MELODIC to the patchIndex. This way, patchIndex will be valid from zero up to (but not including) NUM_DRUMS.
Getting Things Set Up
Now that we have our data structures all in place, we need load all of the percussion patch information from PROGMEM and configure our drum_patch_index pointers. We do this by adding a few lines to our setup function:
void setup(void) {
  PROC_YM3812.reset();

  // Initialize Patches
  for( byte i=0; i<MAX_INSTRUMENTS; i++ ){
    inst_patch_index[i] = i;
    loadPatchFromProgMem( i, inst_patch_index[i] );
  }
  for( byte i=0; i<NUM_DRUMS; i++ ){
    drum_patch_index[i] = i;
    loadDrumPatchFromProgMem( i, drum_patch_index[i] );
  }

  //MIDI Setup
  MIDI.setHandleNoteOn(  handleNoteOn );
  MIDI.setHandleNoteOff( handleNoteOff );
  MIDI.setHandleProgramChange( handleProgramChange );

  MIDI.begin();

}
The only new code here is the second for loop. This loop goes through each drum and assigns a patch index sequentially. Then it loads each patch from PROGMEM into the drum_patch_data array in RAM by running the loadDrumPatchFromProgMem function.
Playing Percussion Sounds
Now with all of our data loaded, let’s update our handleNoteOn function to accommodate the percussion special case.
  if( DRUM_CHANNEL == channel ){
    drumIndex = (midiNote - FIRST_DRUM_NOTE) % NUM_DRUMS;
    PROC_YM3812.patchNoteOn( drum_patch_data[drumIndex] );
  } else {
In the event that the MIDI channel equals DRUM_CHANNEL then we need to load our patch based on the noteNumber passed into the handleNoteOn function. To calculate the index of the patch in our drum_patch_data array, we need to subtract the FIRST_DRUM_NOTE from the midiNote. We do this because MIDI note 35 is the first key on the keyboard associated with a percussion sound.
Of course, you can play notes on the keyboard outside of the boundaries of the array—lower than B0 or higher than A4. This would cause drumIndex to fall outside of the boundaries of the drum_patch_data array. To fix this, we just mod the index with NUM_DRUMS so that whatever key you press will result in a valid index. This ensures that every key on the keyboard plays a percussion sound even if it falls outside of the valid range.
With a valid index in hand, we can play it by passing the associated entry from drum_patch_data to the patchNoteOn function from our YM3812 library. But wait a tic… doesn’t the patchNoteOn function require a midi note to play?
Using a Default MIDI Note
Yes. The patchNoteOn function does require a MIDI note to play. But which note should we use? If we use the midiNote argument passed to the handleNoteOn function, then the pitch of every percussion patch would depend on the key its associate with. That’s definitely not what we want. We need the ability to assign the best sounding MIDI note for each percussion patch. And that means we need a default MIDI note in our patch. Turns out… we do!
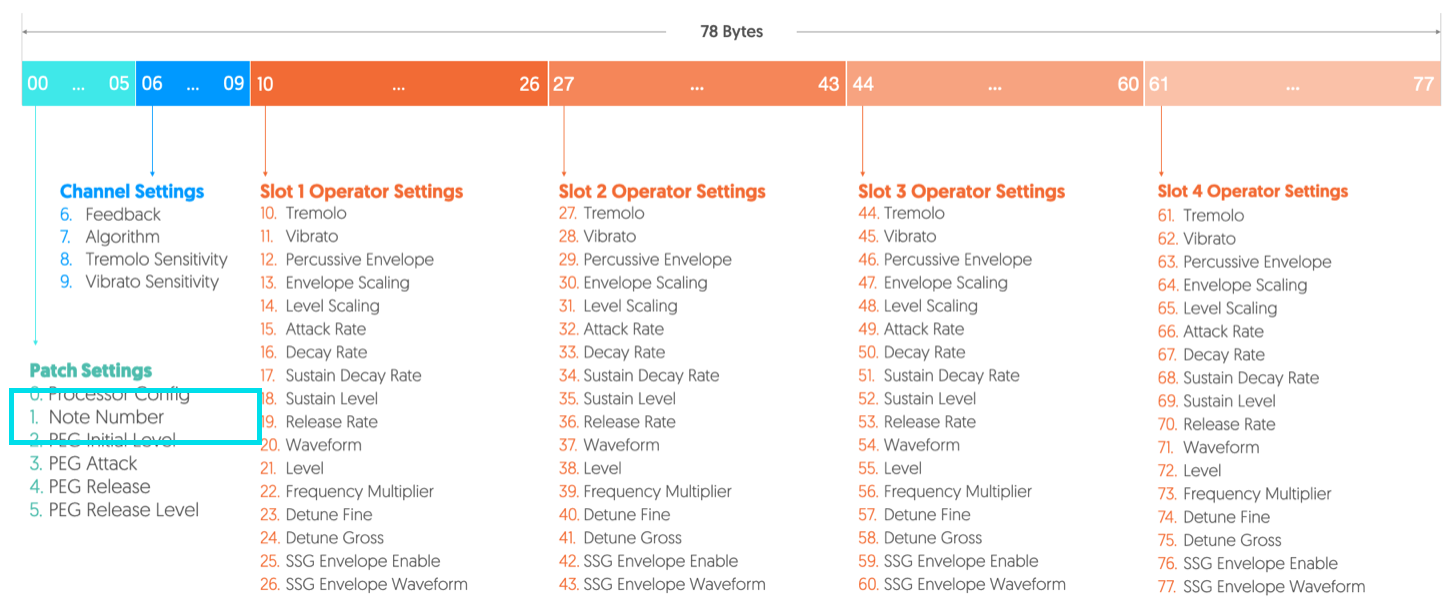
The Note Number setting represents the default note to use for percussion instruments. Now all we just need to update the YM3812 class to use it. And we are going to do that by overloading the patchNoteOn / Off functions inside our YM3812 class:
void patchNoteOn(  PatchArr &patch ){ patchNoteOn(  patch, patch[PATCH_NOTE_NUMBER]); }
void patchNoteOff( PatchArr &patch ){ patchNoteOff( patch, patch[PATCH_NOTE_NUMBER]); }
To overload a function in C++, you just define a new function with the same name. This works so long as the arguments passed into the function are different. In this case, we define patchNoteOn to require ONLY a patch and not a midiNote. Then, inside of the function, we call the original patchNoteOn function and pass the patch as well as the note number contained inside.
With the overloaded function in place, the midiNote argument becomes optional. If you pass it, then it will be used to define the pitch of the note. But if you don’t pass it, then the default note number inside the patch will be used instead.
The Full handleNoteOn function
With all of that theory out of the way, the full function looks like this:
void handleNoteOn( byte channel, byte midiNote, byte velocity ){
  uint8_t ch = channel - 1;
  uint8_t drumIndex;

  if( DRUM_CHANNEL == channel ){
    drumIndex = (midiNote - FIRST_DRUM_NOTE) % NUM_DRUMS;
    PROC_YM3812.patchNoteOn( drum_patch_data[drumIndex] );
  } else {
    PROC_YM3812.patchNoteOn( inst_patch_data[ch], midiNote );
  }

}
If the MIDI channel isn’t the DRUM_CHANNEL then we call the patchNoteOn function, but pass the patch associated with instrument along with the midiNote to play. The handleNoteOff function works the same way:
void handleNoteOff( byte channel, byte midiNote, byte velocity ){
  uint8_t ch = channel - 1;
  uint8_t drumIndex;

  if( DRUM_CHANNEL == channel ){
    drumIndex = (midiNote - FIRST_DRUM_NOTE) % NUM_DRUMS;
    PROC_YM3812.patchNoteOff( drum_patch_data[drumIndex] );
  } else {
    PROC_YM3812.patchNoteOff( inst_patch_data[ch], midiNote );
  }

}
Demo Time!
Well, those are all of the changes to the code. And of course, you can find everything neatly packaged up on GitHub if you want to try it out for yourself! In the meantime, here are some deep links to the demos in the main video:
Each note on the keyboard plays a different sound:
Going direct from a Beatstep Pro into the module:
A side by side comparison of the Space Quest 3 intro music playing on the YM3812 module vs. emulated Adlib sound from ScummVM:
For reference, the audio played in this demo comes from the ScummVM emulator using the default Adlib sound output setting. Now to be clear, the sound difference between the YM3812 module and the emulated Adlib goes way beyond hardware vs. software implementation. In this case, the sound patches themselves are different. That alone significantly changes things. But I also think that’s part of the fun of this. You can change the orchestration of your favorite songs in your favorite video games, and that’s kind of cool.
Conclusion
With only a few minor code additions, we’ve added another pretty substantial piece of functionality to the module. At this point, I’m debating where to take things next. We still need to add more accurate level control in order to accommodate velocity sensitivity, and similarly, detuning & pitch-bend. Also, we have most things in place to enable 2×2-operator voices. From there, we can start to look at a dual-YM3812 chip setup for stereo and panning. And of course we still need to add input control and a menu system—that’s going to be a big job. If one of these jumps out at you more than another, let me know in the comments. And if you are following along and run into questions, feel free to drop a note there as well!
Here is a link to the GitHub if you want to see the code in full:
https://github.com/TylerK07/YM3812-Module/tree/master/Articles%207
